


Top Creative Backsplash Ideas: Kitchen Transformation
December 1, 2025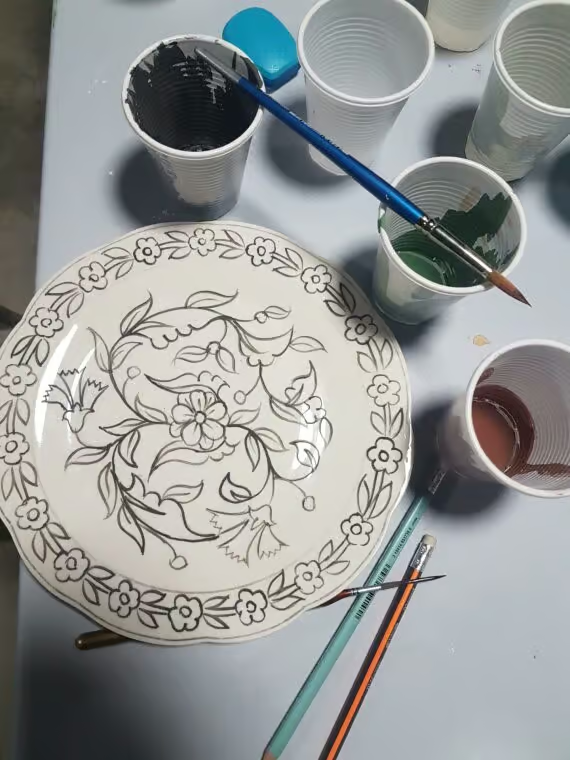
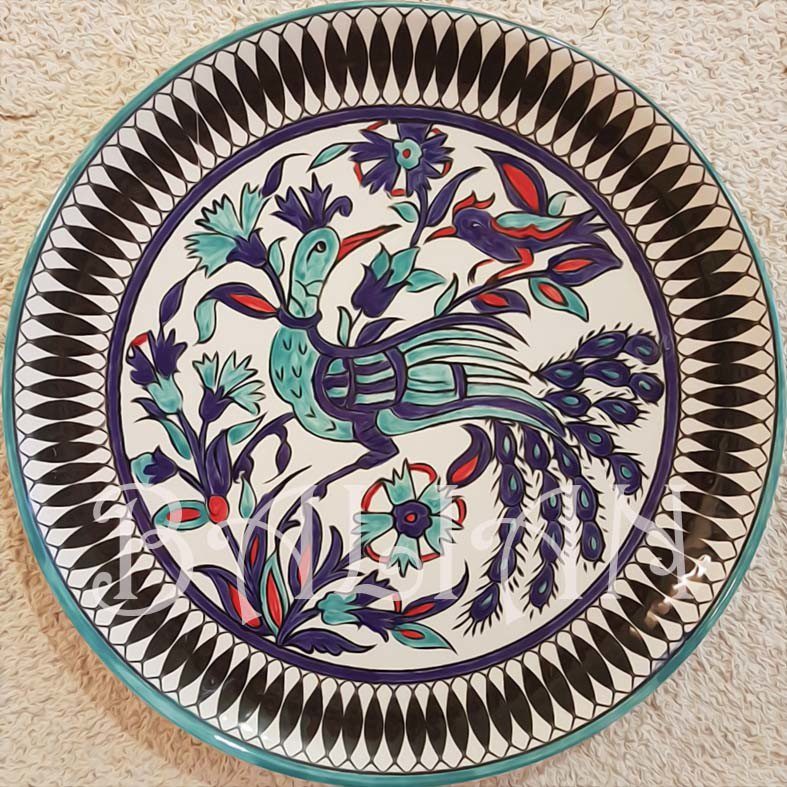
Creative Decorating Ideas with Plates to Transform Your Space
December 8, 2025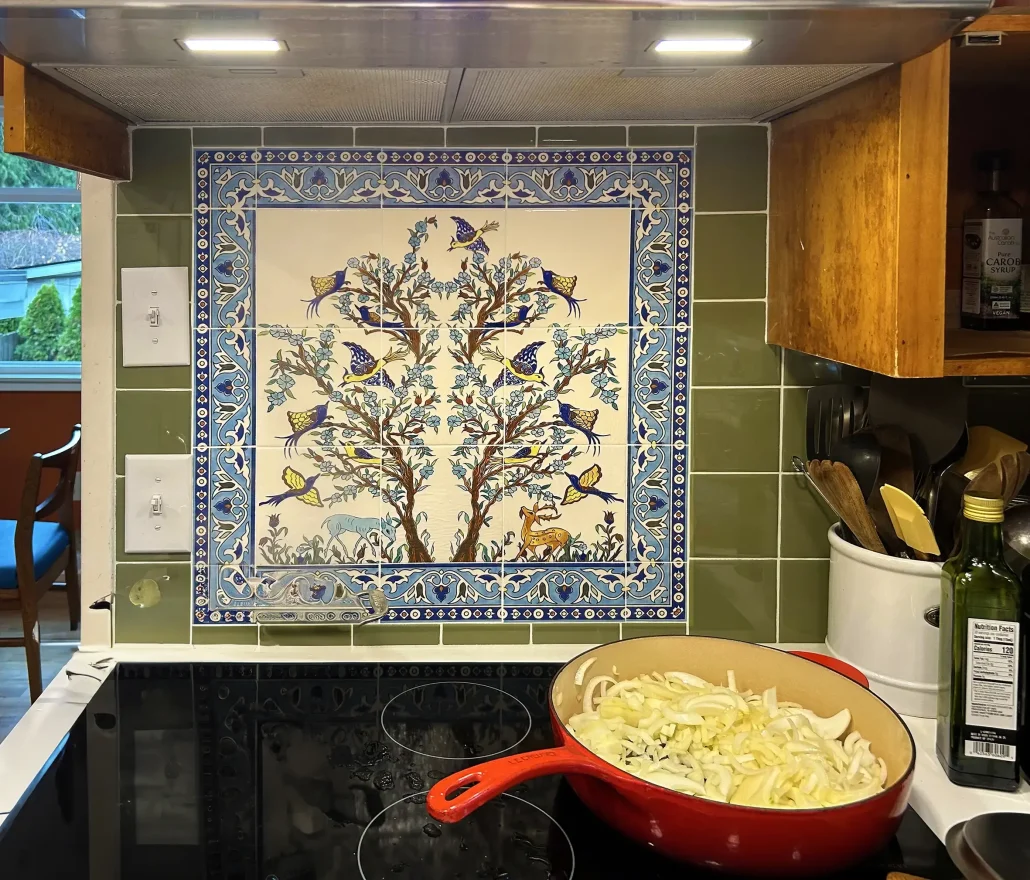
How to Tile a Kitchen Backsplash: A Complete DIY Guide
A kitchen backsplash is a decorative and practical addition that improves the overall appearance of the area. It offers protection from splashes, stains, and heat while adding a touch of personality to your cooking area. Installing a backsplash can seem like a daunting task, but with the right tools, materials, and a bit of patience, you can create a stunning kitchen feature all on your own. In this comprehensive guide, we’ll walk you through each step to tile a kitchen backsplash, offering helpful tips and suggestions along the way.
Why a Backsplash Matters in a Kitchen
A backsplash is much more than just an aesthetic choice; it plays an essential role in keeping your kitchen clean and functional.
- Protection from Spills & Splashes: As you cook, splashes of water, oils, sauces, and food crumbs are inevitable. A backsplash creates a barrier to keep these messes from staining your walls. It protects the area behind your stove, sink, and counters, preventing long-term damage.
- Aesthetic Appeal: While the primary purpose of a backsplash is functional, it’s also an opportunity to elevate your kitchen’s design. Whether you choose a traditional subway tile or go for something more artistic, a backsplash adds character, dimension, and style.
Choosing to install a backsplash yourself brings additional benefits. A DIY backsplash tile project can save you money on labor costs, while also giving you full flexibility and creative control over the design. Whether you opt for a classic look or a more unique, artistic style, the choice is yours.
What Tools and Materials You’ll Need
Before you get started, ensure you have the right tools and materials. Having everything ready will make the installation process smoother and more efficient.
Essential Tools:
- Trowel: Used to spread the adhesive onto the wall evenly.
- Tile Cutter or Wet Saw: For cutting tiles to fit edges and obstacles.
- Measuring Tape: To measure tile placement and layout.
- Level: Ensures that your tiles are installed perfectly straight.
- Grout Float: To apply grout and smooth it into the spaces between the tiles.
- Sponge: For cleaning excess grout after application.
- Bucket: To mix adhesive and grout.
Materials:
- Tiles: Ceramic, porcelain, or natural stone tiles are popular choices. For kitchen backsplashes, subway tiles are a go-to option due to their classic appeal.
- Adhesive (Mortar): A strong adhesive to secure the tiles to the wall.
- Grout: To fill the spaces between tiles and provide a finished look.
- Spacers: To ensure even spacing between tiles.
- Sealant: Protects the grout and tiles from moisture, stains, and dirt.
- Backer Board (if needed): This is especially important if your wall is not ideal for tiling directly.
Prepare Your Kitchen for Tiling
Proper preparation is key to ensuring a smooth and successful backsplash installation.
- Clean the Wall: The surface where you’ll be tiling needs to be clean and free from any grease, dust, or debris. Use a mild cleaner and a sponge to wash the area before you begin.
- Check the Surface: Ensure that the wall is flat and smooth. If there are any cracks or holes, repair them with patching compound or spackle. An uneven wall can cause tiles to shift, leading to misalignment.
- Measure & Plan Your Layout: Measure the width and height of the backsplash area, and plan your tile layout accordingly. Take into account any power outlets, switches, or other obstacles. Mark your reference lines to help ensure symmetry and consistency.
Tip: It’s a good idea to lay out the tiles on the floor first, without adhesive, to visualize how they’ll fit in the space. This is especially important around the edges, corners, and any obstacles like outlets.
Why Pick Subway Tiles & What You Need to Consider
Subway tiles are beloved for their versatility, but it’s important to understand why they’re such a great choice for a kitchen backsplash:
- Timeless Style & Versatility: Subway tiles have a classic appeal that complements a variety of design styles. Whether you’re aiming for a traditional, modern, rustic, or minimalist kitchen, subway tiles blend seamlessly into any space.
- Durability & Practicality: Glazed ceramic or porcelain subway tiles are resistant to stains, heat, and water, making them highly durable and perfect for the kitchen environment. They’re easy to clean, and with proper care, they can last for decades.
- Design Flexibility: Subway tiles come in a variety of colors, finishes, and layouts, allowing you to get creative with your design. You can opt for classic white tiles or add color to create a more vibrant space. There are also different layout options, such as:
- Running Bond (Brick Style): A classic layout where tiles are offset by half their length, creating a brick-like appearance.
- Stacked: All tiles are aligned in neat rows, offering a clean, modern look.
- Herringbone: A stylish pattern that creates a chevron effect, adding visual interest to the backsplash.
- Vertical or Horizontal: Tilting the tiles vertically or horizontally can create unique lines and effects.
Step-by-Step Guide to Installing Your Tile Backsplash
- Applying the Adhesive: Use a notched trowel to spread adhesive evenly onto the wall. Work in small sections to prevent the adhesive from drying before you apply the tiles. Apply just enough adhesive to cover the area you plan to tile at one time.
- Placing the Tiles: Start from your central reference line or corner. Place your first tile, and use spacers to maintain even gaps between tiles. Continue placing tiles across the wall, checking frequently to ensure they’re straight and level.
- Cutting Tiles for Edges & Obstacles: Measure the tiles carefully for any cuts needed around edges, corners, or outlets. Use a tile cutter or wet saw to cut the tiles as needed. Smooth any rough edges with a tile file to ensure a clean finish.
- Allow Time for Adhesive to Cure: Allow the adhesive to cure for the recommended amount of time before grouting. This ensures that the tiles are securely bonded to the wall.
Tips for a Professional-Looking Backsplash
- Maintain Consistent Spacing: Use quality spacers and check alignment regularly to ensure uniform gaps between tiles.
- Choose the Right Tile Layout: Select a tile layout that complements the style of your kitchen. Classic running bond, modern stacked, or bold herringbone—each offers a distinct look.
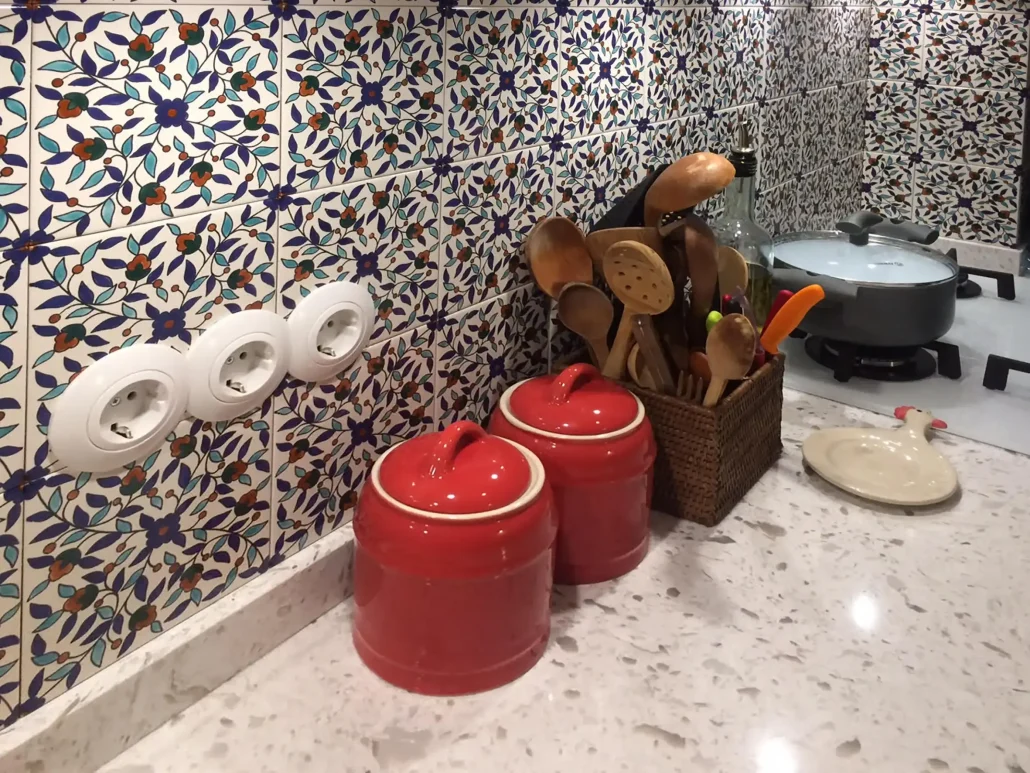
- Mix & Match with Decorative Tiles: Consider using artisanal tiles from Balian Ceramics to add flair to your design. Combine plain subway tiles with accent tiles or decorative borders to add texture and visual interest to your backsplash.
Troubleshooting Common Issues & Maintenance Tips
- What to Do if Tiles Shift: If tiles shift before the adhesive sets, gently reposition them. If the adhesive has dried, carefully remove and reapply the tiles.
- Cleaning & Sealing: Clean your tiles regularly with a mild, non-abrasive cleaner to prevent buildup. To protect the grout and prevent stains, reseal it every 6 to 12 months, especially around cooking zones.
- Preventing Cracks & Chips: Avoid using harsh chemicals or abrasive cleaning tools that can damage the grout or tile surface. Be mindful of impacts to prevent tile cracking.
Tiling your kitchen backsplash is a rewarding and cost-effective DIY project that can completely transform your space. With a little time, effort, and the right tools, you’ll have a beautiful and functional backsplash that protects your walls and enhances your kitchen’s overall look.

